
For some reasons, there is no simple guide on how to use the ADC of STM32F4, which is widely used in the STM32F4 Discovery Evaluation board. Here I use the GCC ARM toolchain with eclipse.
Start STM32CubeMX which is available for nearly all platforms (Linux/Mac/Windows). Create a new project and configure your desired analog input pins by checking the PINs under Pinout -> ADCX -> INX

Click on GPIO_Analog to activate GPIO Analog input, here you could also activate ADC IN if not done in the previous step.

You can configure the ADC going to Configuration and clicking the ADC Button in the center of the screen.
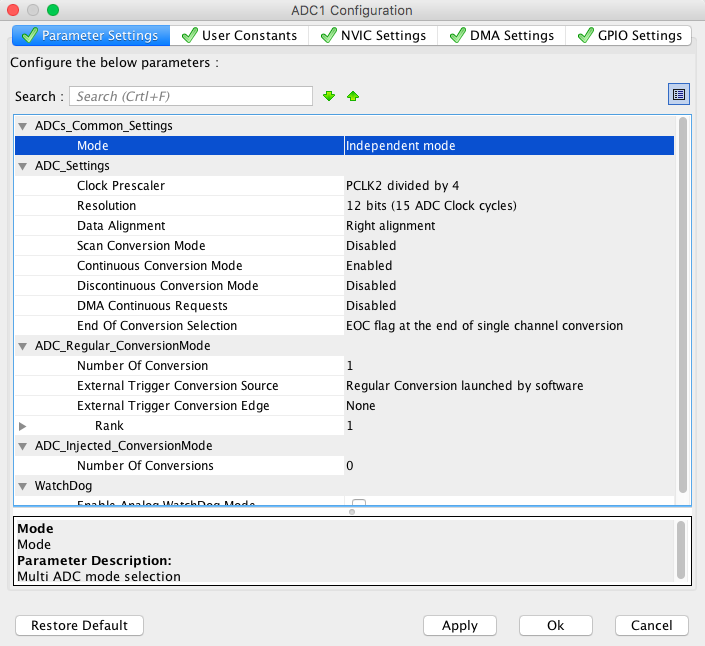
For testing you can copy my settings:
Generate code by going to Project -> Generate Code. You should choose SW4STM32 as Toolchain, even if using Eclipse in the end.
If you didn’t create and test your project in your favorite IDE yet, make sure to copy all source and header files of the generated folder to your project. Also, make sure that the assembly file under startup is compiled (in eclipse change the case of the file extension from startup_stm32f407xx.s to startup_stm32f407xx.S).
Info: The file stm32f4xx_hal_msp.c is important for initializing the ADC. It enables the RCC timer by calling __HAL_RCC_ADC1_CLK_ENABLE.
The generator should have generated the functions MX_GPIX_INIT() and MX_ADC1_INIT() in main.c.
After calling them, you can query the ADC this way:
uint32_t adcValue;

for (;;)
{
    HAL_ADC_Start(&hadc1);
    if (HAL_ADC_PollForConversion(&hadc1, 1000000) == HAL_OK)
    {
        adcValue = HAL_ADC_GetValue(&hadc1);
        trace_printf("value: %u\n", adcValue);
    }
    HAL_ADC_Stop(&hadc1);
}
trace_printf uses semihosting to display information of stdout to the debug console, you could instead set a breakpoint. We use simple polling with HAL_ADC_PollForConversion.